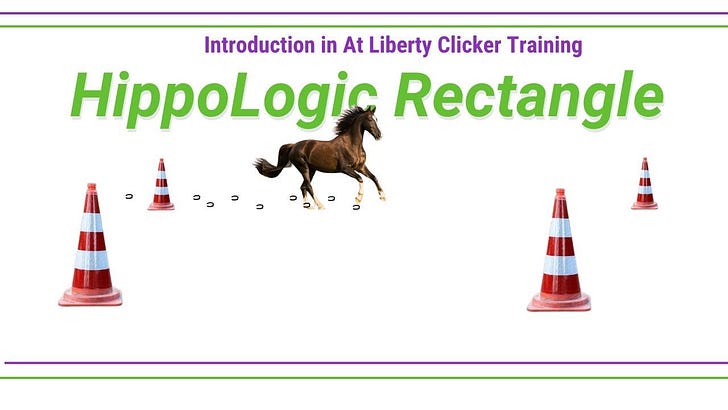

Start Your Horse at Liberty using The HippoLogic Rectangle
Takeaways from the Masterclass Introduction in At Liberty Horse Training

What You’ll Learn
What is At Liberty Training
Why use a Rectangle and not a circle
HOW to start your horse At Liberty
Watch the Masterclass and then come back for the Action Steps!
Suggested Action Steps After Watching Masterclass
Start by training a solid foundation, so you can train the HippoLogic Rectangle (HL-R) fast. Prevent frustration by starting what the end goal behaviour (a rectangle) looks like. Instead break it down into small, easy to understand and actionable steps.
The more steps you break your goal behaviour into, the easier it will be to combine the super easy and straightforward behaviours. Dividing your end goal behaviour in many small steps will also give you the opportunity to adjust possible mistakes easier. A minor mistake in a simple, straightforward behaviour is easier to fix than a mistake in (
a) complex (chain of) behaviours.
In this article I elaborate on what you can do at home and if you want to start by yourself. I offer 6 easy steps to start with.
In case you would love to teach your horse this in only 4 weeks, and want step-by-step Shaping Plans, Training Tips and ‘Pitfalls & Solutions’-cheat sheet: join the Introduction At Liberty Training Using The HippoLogic Rectangle.
Basic Behaviour #1 Safety
Teach Key Lesson #1 Table Manners: Start by training your horse to have safe behaviors around treats. This keeps everyone safe and helps the horse learn when it's appropriate to take treats. In Table Manners your horse also learns other valuable things, like paying attention to the click.
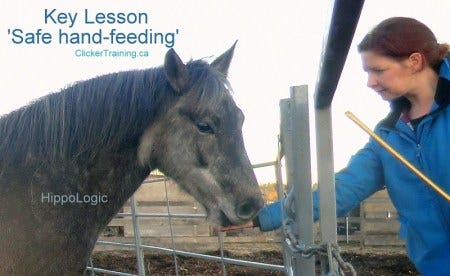
Table Manners will explain the rules of positive reinforcement training to your horse:
Click = treat. Your horse gets something valuable that he wants to have and work for
Paying attention to the click and repeating the behaviour he was doing
That mugging for treats won’t lead to treats. The opposite is true!
Treat will be delivered to his lips and no need to come and get it.
Basic Behaviour #2 Relaxation
Practice and teach your horse Key Lesson #2 Patience: Help your horse develop a default behavior of patience. Train your horse to stand calmly beside you instead of repeatedly guessing what you want. This reduces frustration for both of you.
Teach your horse before you cue him (and he can potentially earn an appetitive (=treat)), you want him to wait and relax first. That way you build in relaxation, patience and you won’t get a horse that keeps throwing behaviours at you which almost always ends in frustration
.
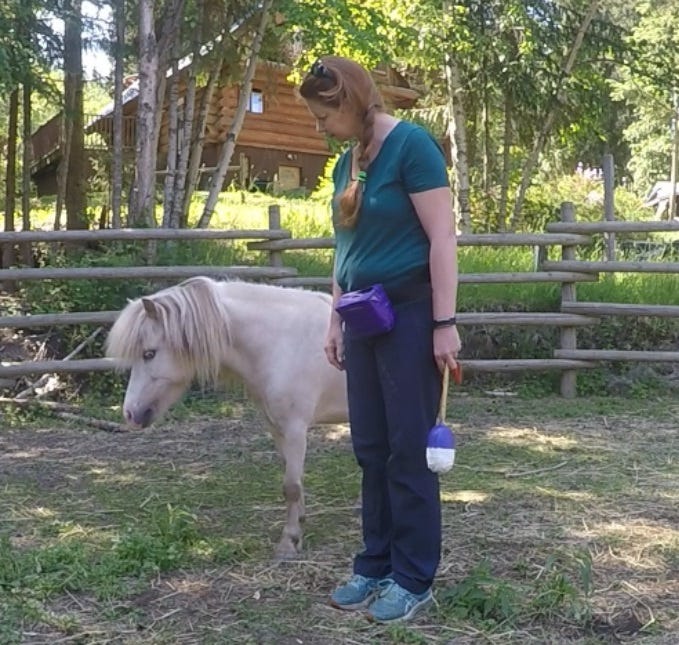
Basic Behaviour #3 Guiding
Use Key Lesson #3 Targeting to guide your horse where he needs to go. You can do this by introduce targeting in your first few training sessions. This method allows your horse to understand where you want them to go, making it easier to teach them many other behaviors, too.


Basic Behaviour #4 SEND your horse away
Incorporate Key Lesson #4 Mat Training: Use mat training to teach your horse where to go. Putting a mat on the ground helps them learn to leave your side willingly and understand that he doesn’t only get treats when he’s standing next to you. Moving away will also lead to treats!
Practical Training Set Up
Set Up Appropriate Training Areas: Make sure your training area is a suitable size. If it’s too big or too small, it can confuse your horse and lead to mistakes.
Start with teaching ‘going around’ on 1 cone, then make a line with a few cones.
Putting Everything Together
Once you can do the following you can start combining steps. Not everything at once! Just adding more and more what he already understands.
Teaching your horse to wait for your cue (Key Lesson Patience)
GO AROUND one cone
SEND your horse away from you, willingly and confidently (mat)
Add ‘distance’ to the mat
Add distance to GO AROUND the cone
Wait + SEND your horse to a cone at 3 meters distance + ask to GO AROUND it
Set up a line of cones: Ask your horse to keep the cones between you and your horse, when you set them up in a line
Fade out your training tools: target, mats
Finally make a Rectangle and send him around the 4 corner cones
Change your reinforcement schedule
(Need help? Join the program and get my personal feedback on your training videos each week!)
Make training worthwhile for your Horse
Utilize Positive Reinforcement: Encourage your horse to offer behaviors by using positive reinforcement. This creates a fun and motivating learning environment for both you and your horse.
Start with a high rate of reinforcement: lots of clicks and treats at first. This will keep your horse engaged and willing to learn. Just like in Fionn’s first session: 2 minutes 30 and over 25 clicks& treats!
Happy Horse Training!
let me know if you have any questions: happy to answer them for you!
Sandra